

If you‘re wondering how to make a PowerPoint presentation attractive, you’ve landed in the right place. Whether you're pitching to investors, presenting a quarterly review, or walking a client through a proposal, great PowerPoint tips can mean the difference between a presentation that lands and one that loses the room.
I‘ve spent years creating decks with very average design instincts, and what I’ve discovered is that a few focused choices in layout, typography, and visuals can transform even the most basic slides into something worth watching.
Before you ever open PowerPoint, though, consider this: most great presentations start with a great meeting. Tools like help you set the stage before you ever share your screen, making sure you're presenting to the right people, at the right time, with the right context.
Table of Contents
- How to Make Your PowerPoint Presentation Attractive
- How to Make a PowerPoint Presentation
- PowerPoint Presentation Tips
- Common PowerPoint Presentation Mistakes to Avoid
How to Make Your PowerPoint Presentation Attractive
Making a presentation look polished isn‘t about being a designer. It’s about following a handful of principles that signal professionalism and keep your audience focused. Here are seven steps I've found that make the biggest visual impact.
Step 1: Start With a Strong Visual Theme
Before adding a single word of content, choose a cohesive visual direction. This means settling on a color palette (two to three colors maximum), a font pairing, and a general layout style. I recommend pulling from your brand's existing identity if you have one, since consistency builds trust and trust keeps audiences engaged.
Pro Tip: Avoid Microsoft‘s default themes out of the box. They signal a lack of effort. Instead, browse HubSpot’s to find a polished starting point.
Step 2: Apply the 6x6 Rule for Text
Text-heavy slides are the number one killer of audience attention. My experience has taught me to follow the 6x6 rule: no more than six bullet points per slide, and no more than six words per bullet. This forces clarity and keeps your visuals from becoming walls of text.
What we like: When slides have minimal text, presenters are compelled to speak more naturally rather than reading aloud, which always improves delivery.
Step 3: Choose Typography That Works Hard
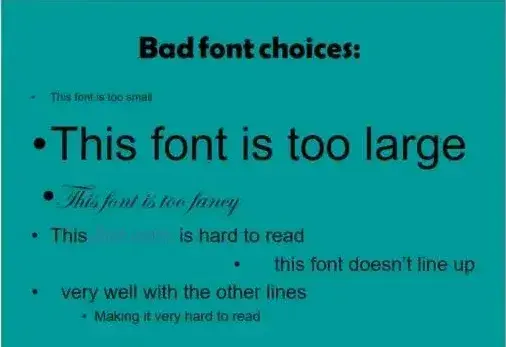
Typography does a lot of heavy lifting in a presentation. Stick to clean serif or sans-serif fonts like Lato, Montserrat, or Georgia, and avoid decorative or script fonts, which are hard to read at a distance. Use font size 24pt or above for body text, and create a clear visual hierarchy with your headline, subhead, and body styles.
Pro Tip: Embed your fonts before sharing your file (File > Options > Save > Embed fonts in the file on PC, or PowerPoint > Preferences > Save > Font Embedding on Mac). This prevents fonts from changing when the file is opened on a different computer.
Step 4: Use High-Quality Images and Graphics
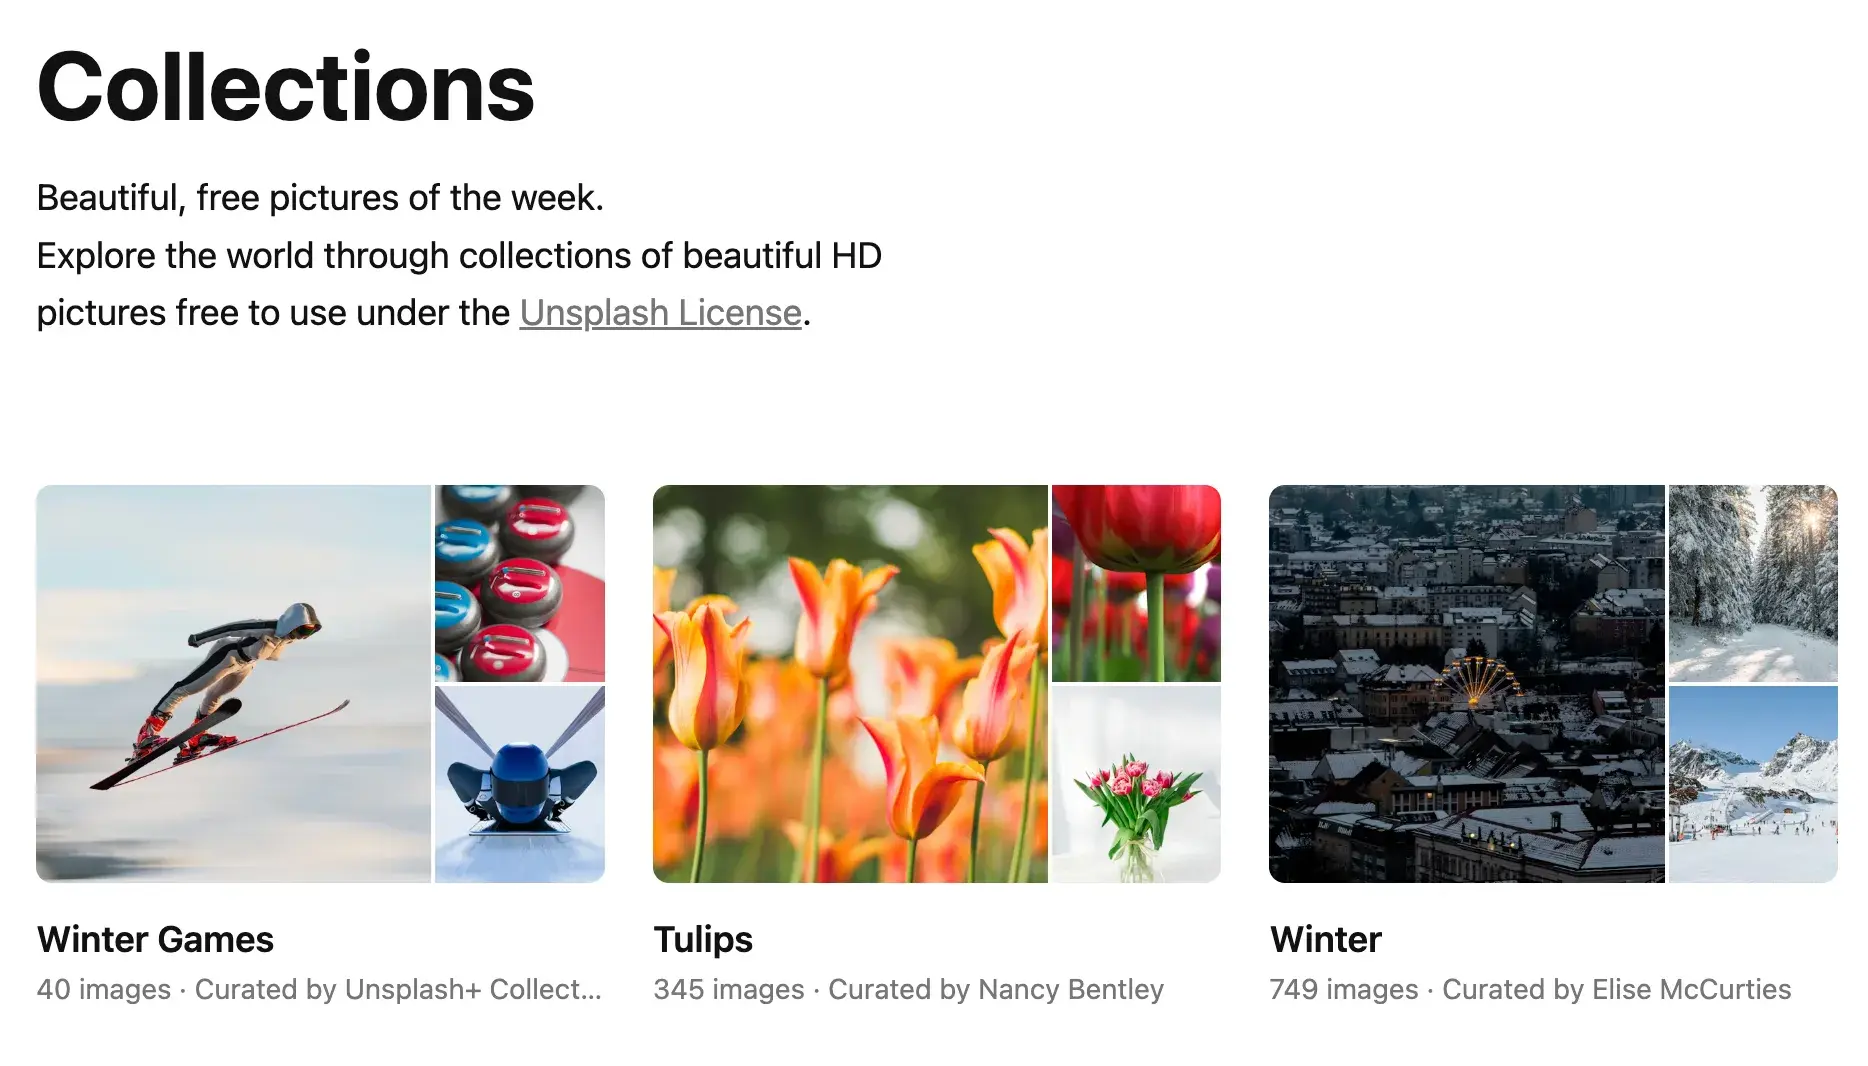
Stock photos that look staged or clip art from 2005 will undermine your credibility. I've found that using high-resolution photography, clean icons, and custom shapes gives presentations a modern, professional edge. Free resources like or offer quality imagery at no cost.
Best for: Client-facing presentations and executive briefings where first impressions are critical.
Step 5: Create Visual Consistency With Alignment
Nothing makes a slide look more amateur than objects that are slightly off-center or unevenly spaced.
PowerPoint's alignment tools solve this instantly: select all objects, click Arrange > Align or Distribute, and choose your alignment type. I do this on every slide before considering it finished.
Step 6: Use White Space Intentionally
Negative space — the empty areas on a slide — is not wasted space. It gives the eye somewhere to rest and makes the content that is there feel more intentional and impactful. Resist the urge to fill every corner of your slide. Breathing room is a design feature.

What we like: Slides with generous white space consistently read as more premium and confident than cluttered ones.
Step 7: Limit Your Color Palette and Use Contrast
Stick to two to three brand-aligned colors across the entire deck. Use high contrast between text and background so your content is readable in any lighting condition. Use a bold accent color sparingly to highlight key information or calls to action.
How to Make a PowerPoint Presentation
Microsoft PowerPoint is one of the most widely used professional tools in the world, and each presentation is made up of individual slides that tell a cohesive story. Successful presentations depend on three factors: your command of PowerPoint's design tools, attention to process, and consistency of style.
Getting Started
1. Open PowerPoint and click ‘New.’
A page with templates will usually open automatically. If not, go to the top-left and click New. If you've already created a presentation, select Open and double-click the file to open it.
2. Choose a theme or create your own.
Microsoft offers built-in themes and color variations for a cohesive look. Go to File > New, choose a theme, and click Create. Alternatively, start from a blank presentation and apply your own brand colors and fonts.
Pro Tip: HubSpot offers spanning creative, data-driven, and professional styles, well worth browsing before you start from scratch.
Creating PowerPoint Slides
3. Insert a slide.
Click the Home tab, then New Slide. Choose a layout based on the content you're planning: title only, content with image, two-column, and so on.
4. Create a variety of slide layouts.
A great deck doesn't repeat the same layout over and over. At minimum, I typically include a title slide, an agenda slide, a speaker intro slide, and several distinct content layouts. Variety keeps the audience visually engaged.
5. Use the “Duplicate” feature to save time.
Right-click a slide thumbnail in the left pane and select Duplicate Slide. This saves you from redesigning a layout from scratch — just swap the content.
6. Add photos and visuals.
Click Insert > Pictures to add images. Drag and reposition elements freely to explore your layout. To crop an image into a custom shape, click Picture Format > Crop > Crop to Shape and select the shape you want.
Finishing Up
7. Save your presentation.
Click File > Save and choose your storage location. If you‘re presenting on a different computer, save a PDF backup (File > Export > PDF). Your fonts and layouts will be preserved, though animations won’t transfer.
8. Run a trial presentation.
Go to Slide Show > Play from Start. I always do at least one full run-through to catch layout issues and make sure animations fire correctly.
9. Advance slides during your presentation.
Click your mouse or use the arrow keys to advance slides when presenting.

10 Free PowerPoint Templates
Download ten free PowerPoint templates for a better presentation.
- Creative templates.
- Data-driven templates.
- Professional templates.
- And more!
Download Free
All fields are required.
Form not available
You're all set!
Click this link to access this resource at any time.
PowerPoint Style Tips
Style Tips
1. Don't let PowerPoint decide how you use PowerPoint.
PowerPoint's defaults — Calibri fonts, blue shapes with drop shadows, automatic bulleting — are not your friend. Override them. A presentation that looks intentionally designed reads as far more credible than one that accepted every default setting.
Key things to watch: remove default shadows from shapes, avoid Microsoft's default fonts, and never use action sounds.
2. Create custom slide sizes.
Default slides work in most contexts, but for large displays or non-standard screens, adjust via File > Page Setup. Resize slides before adding content to avoid skewed objects.
3. Edit your slide template in Slide Master.
The single biggest time-saver I've found: edit the Slide Master before building your deck. Go to View > Master > Slide Master, make your changes, then close. Every slide inherits those settings automatically.
4. Write text with your audience in mind.
Keep slides to 6-8 lines maximum and 30 words at the most. Use a minimum font size of 24pt. Ask yourself: can someone read this from the back of the room?
On typography: choose fonts that reflect your brand‘s personality without sacrificing readability. Simple serif and sans-serif fonts work best. Avoid script fonts. See this example from HubSpot’s company profile templates for reference — clear, professional, and consistent throughout.
5. Align all objects properly.
Select all objects (Shift + click), then go to Arrange > Align or Distribute. Choose your alignment type. For aligning to the slide itself, click Align to Slide first before selecting your alignment direction. This is non-negotiable for a polished look.
Design Tools
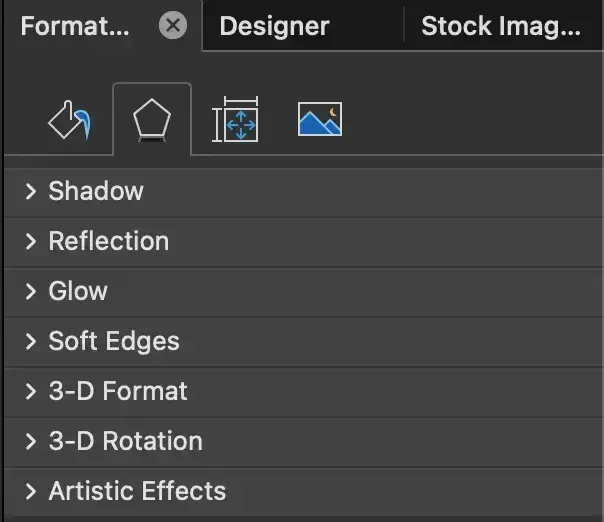
6. Use “Format Object” for fine-tuned control.
Right-click any object and select Format Object to access advanced options: shadow depth, shape dimensions, reflections, text padding inside shapes, and manual photo recoloring. This is where the real fine-tuning happens.
7. Use PowerPoint's Smart Shapes.
Shapes aren‘t just decorative. They’re a great way to visualize information that would otherwise be a bullet list. Smart Shapes in PowerPoint make it easy to build flow charts, process diagrams, and comparison visuals quickly.
8. Create custom shapes.
Right-click a shape and choose Edit Points to reshape it manually. Or, select two shapes and use Shape Format > Merge Shapes to combine them. Options include Union, Combine, Intersect, Subtract, and Fragment, each producing a different result.

9. Crop images into custom shapes.
Click an image, then Picture Format > Crop > Crop to Shape. This is a simple technique that adds a lot of visual polish with minimal effort.
Best for: Cover slides, speaker bios, and feature highlight slides.
10. Present websites within PowerPoint.
The most reliable approach is to take a screenshot of the website and embed it as an image with a live browser link ready as a backup. For more seamless in-slide browsing, tools like overlay an interactive browser window on top of your slide during a presentation. PowerPoint Live is also worth exploring for remote presentations.
11. Use GIFs strategically.
GIFs can add energy to a presentation. I use them to quickly demo a process or add a moment of levity. To insert one: save the GIF locally, then go to Insert > Pictures > Picture from File. It will loop automatically once inserted.

What we like: GIFs work especially well in internal presentations and sales decks where tone can be more conversational.
Process Tips
12. Keep it simple.

PowerPoint should support your message, not replace it. If your slides are dense and cluttered, your audience will disengage. Strip each slide down to its essential content: limit bullet points, avoid long quotes, maintain white space, and keep data visualizations clean and easy to read at a glance.
13. Embed your font files.
Fonts render differently on different machines because the font file may not be installed. Embed fonts to prevent this: on PC, File > Options > Save > Embed fonts in the file. On Mac, PowerPoint > Preferences > Save > Font Embedding.
14. Save a PDF backup.
File > Save As > File Format > PDF. A good safety net for presenting on unfamiliar hardware, though animations and GIFs won't carry over.
15. Embed multimedia directly.
Embedding video or audio keeps your file self-contained and prevents the awkward window-switching that undermines professionalism. On Mac, always bring the media files in the same folder as the presentation, and use WMV format if presenting on Windows.
16. Bring your own hardware.
The safest option. Presentation formatting can shift between PowerPoint versions and operating systems. If that's not possible, upload your deck to Google Slides as a backup — it renders consistently across all browsers and systems.
To import: go to slides.google.com > File > Import slides > Upload, and select your PowerPoint file.
17. Use Presenter View.
Found under the Slide Show tab, Presenter View gives you speaker notes, a timer, and slide previews on your screen while the audience sees only the presentation. It's one of the best tools for keeping your delivery natural and on time.
Pro Tip: Press CTRL + H at the start of your presentation to hide the cursor. Press “A” to bring it back when needed.
Common PowerPoint Presentation Mistakes to Avoid
1. Reading directly from slides.
It signals you're unprepared and loses your audience fast. Use 2-3 keywords or bullet points per slide as a prompt, not a script.
2. Creating without a clear purpose.
Every presentation needs a single, stateable point. Before building anything, ask: “What do I want every person in the room to walk away knowing?” Check every slide against that answer.
3. Overdoing animations and effects.
Transitions and sound effects should serve the message, not distract from it. When in doubt, cut the effect. Simplicity always reads as more confident.
4. Not practicing timing.
A presentation that feels like 10 minutes in your head often runs 20 minutes live. Practice out loud, ideally in front of someone, and time yourself.
5. Speaking too fast or too slowly.
Nerves speed things up; disengagement slows them down. Record yourself once to hear how your pacing actually sounds. It's a quick calibration tool.
6. Overusing filler words.
“Um,” “like,” and “you know” undermine credibility. Train yourself to pause instead. A confident silence reads better than a string of filler.
7. Ending without a strong close.
“Any questions?” is not a conclusion. Before you present, write one sentence that captures your core message. Close with that, then open for questions.
Your Next Great PowerPoint Presentation Starts Here
With the right design principles, a clean process, and a bit of practice, you can build presentations that genuinely impress. The steps above, from setting a visual theme to nailing your close, are the same framework I return to every time.
Before any of that can happen, of course, you need to get in the room. HubSpot's makes it easy to book time with clients, prospects, or stakeholders so that by the time you're presenting, the groundwork is already laid.
Start with one of our , and you'll be ready to present sooner than you think.
Editor's Note: This article was originally published in February 2025 and has since been updated for comprehensiveness.
10 Free PowerPoint Templates
Download ten free PowerPoint templates for a better presentation.
- Creative templates.
- Data-driven templates.
- Professional templates.
- And more!
Download Free
All fields are required.
Form not available
You're all set!
Click this link to access this resource at any time.
Presentations

![20 Great Examples of PowerPoint Presentation Design [+ Templates]](https://53.fs1.hubspotusercontent-na1.net/hubfs/53/powerpoint-presentation-examples.webp)
![How to Create the Best PowerPoint Presentations [Examples & Templates]](https://53.fs1.hubspotusercontent-na1.net/hubfs/53/powerpoint.webp)


![How to Start a Presentation [+ Examples]](https://53.fs1.hubspotusercontent-na1.net/hubfs/53/how-to-start-presenting.webp)


![How to Create a Stunning Presentation Cover Page [+ Examples]](https://53.fs1.hubspotusercontent-na1.net/hubfs/53/presentation-cover-page_3.webp)